| Cruisers> > Hardy Pilot |
|
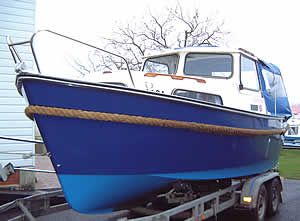
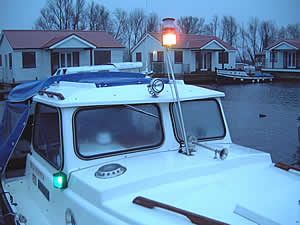
Red Pepper was a 1989 Hardy Family Pilot. She is now re-engined with a 50hp Suzuki 4 stroke EFI outboard, but originally she was powered by a 15hp Honda. I bought her in 2001 from Howard Stokes of Howard Marine at Potter Heigham, Norfolk. Over the winter months I have generally refurbished the boat and made a number of modifications as illustrated on this web page. If they are of interest to any fellow Hardy owners, please feel free to eMail me at the address shown on the Shorebase home page. |
|
 |
First, I should mention the Hardy Owner's Club. Formed 20 years ago, they have a comprehensive web site at http://www.hardy-owner.org.uk/ and they also publish a newsletter to members. The site has a number of member forums and adverts etc. The manufacturer's, Hardy Marine, still produce boats at their North Walsham factory and have a website at http://www.hardy-marine.co.uk |
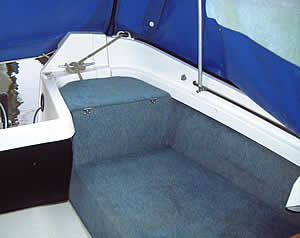
| The cockpit lockers of Hardy Pilots of this era were constructed of plywood and covered with carpet. Red Pepper's needed recovering, but I decided to replace them with new marine ply tops with hinged lids to make it easier to get at the contents and be a bit more weather and dirt resistant. |
|
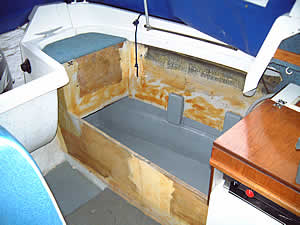
| Newer boats have nice shiny grp internal mouldings, so it was a bit depressing at this stage to see the rough wood. I decided not to machine or replace the locker ply as it was glassed in and provided strength and stiffness to the hull. I lightly sanded the rough spots and painted them with Danboline Bilge Paint, grey on the inside and white on the outside. (Also the inner hull surfaces in the cockpit area, which was also originally carpeted). |
|
|
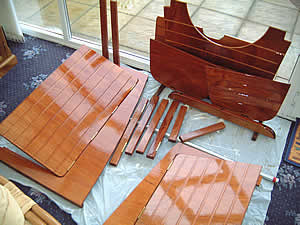
I managed to cut all of the new woodwork from one 8' x 4' sheet of 15mm Mahogany faced BS marine Ply. This was lucky, as it was £125 a sheet !! The strips, used to face the edges of the lockers, were cut from 4"x2" mahogany, which was fortunately more reasonable, at £7 per 2 meter length. I treated everything
with Deks Olje No 1 and 5 coats of Olje No 2, to get the gloss effect. |
 |
|
The 'plank' effect was achieved by routing 2mm deep 8mm wide channels at 75mm centres. |
 |
|
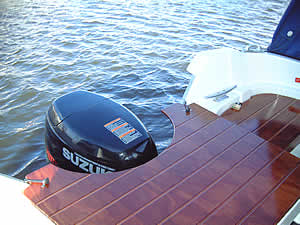
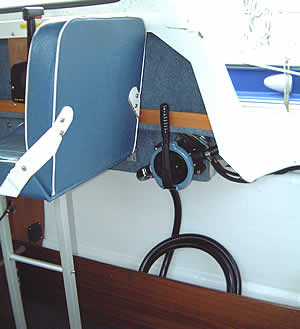
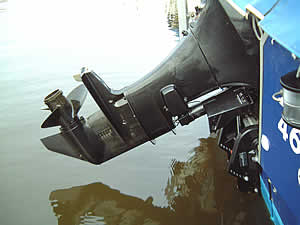
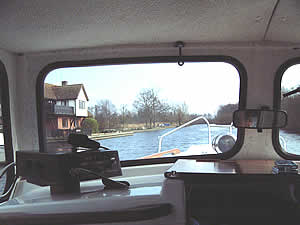
The new outboard well cover had the same effect. Shaped to clear the outboard head, it was fixed with rubber clips to release in case the motor kicks up at speed. It's quite surprising how the noise level is reduced, even though the top of the outboard is still in view. It also reduces draughts from the wind. |
|
| She had
a Webasto diesel heater in the battery compartment, but I
decided to rewire the boat, putting the batteries back in the vented locker,
(and will refit the heater elsewhere at a later date). Painted again with
grey Danboline, it now contains two 85amp leisure batteries. The domestics
are fed via a simple Perko '1/2/all' manual switch. Since
the Suzuki engine is apparently even less tolerant of any accidental alternator/battery
disconnection, it is permanently wired to battery one, with a single pole
isolator switch on it's negative line. A couple of midi fuses protect the
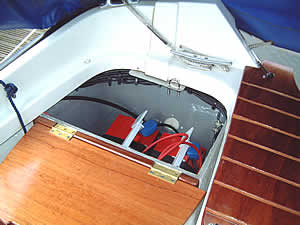
switched and permanent live buses to the main switch panel. The stainless steel ubolt on the alluminium ledge at the back of the locker protrudes through a slot in the lid, enabling it to be locked with a padlock. |
|
|
Due to the lack of an open bilge in the Pilot, I was initially stumped for a location for an auto/manual bilge pump. In the end, I found that the Whale Supersub 500 auto fitted perfectly under the outboard well. Only 2'5" high, it clears the wooden plate that I made to carry the outboard tank(s) level across the vee bottom. (As shown in one of the pictures above.) The outlet is via the transom, between the battery locker and the well. ( Be warned when drilling the hole, the transom is nearly 2" thick here !) |
 |
|
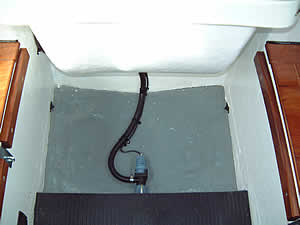
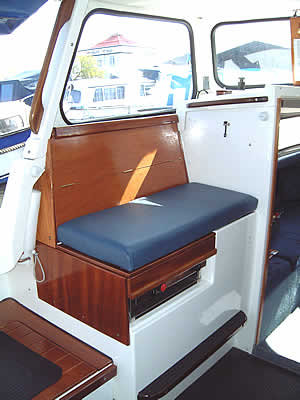
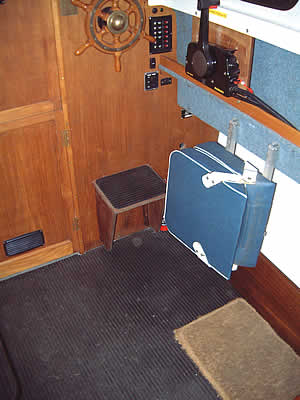
Likewise, the Whale Urchin backup/manual bilge pump was also tricky to find a site for. In the end, I settled for this position, to the rear of the helmsman's seat. It can be operated single handed whilst steering, and the 3 metre intake hose enables any of the water tight bulkheads in the cabin to be selectively pumped. The outlet is ideal, a 6" length of hose, exiting just above the fender rope just past the end of the side deck. I had to cut a 1" mahogany spacer pad, to give enough clearance for the handle. I should also mention that I had already lowered the seat by 3" and moved it forward 3", which gives me a much better driving position (and I'm only 5'7" !). |
 |
|
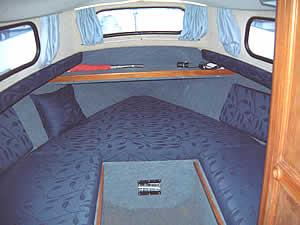
The original white/blue cushions were re-covered using upholstery grade material from a fabrics warehouse. The seat bases and backrest strips were simply restapled, but the smaller square cushions needed the skill and assistance of my other half, as they had zips etc. and were 'boxed'.
|
 |
| Most of the existing woodwork needed treatment, so as it was winter, I decided to dismantle everything and take it home, where the existing varnish could be stripped and a new coating of Deks Olje could be applied in warmer surroundings (for my benefit as well as the wood !) It was fairly easy to unbolt/unscrew the bulkhead, the toilet compartment and the doors and frames. | 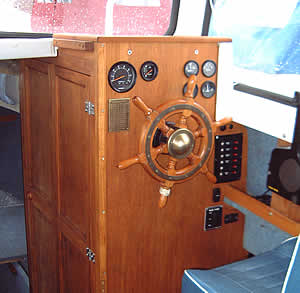 |
|
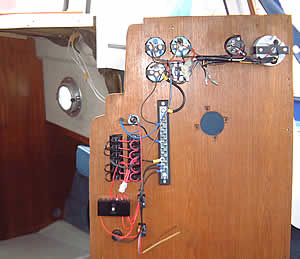
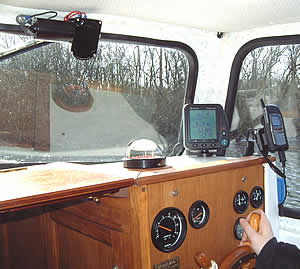
This gave the other advantage that installation of the new instruments and wiring could be prefabricated at home. The panel was then fitted back in the boat with 50% of the wiring already complete. I fitted the Suzuki's Tacho & Trim gauges, plus ammeter, voltmeter, hourmeter and cylinder head temperature gauges. A new 6 way switch panel with circuit breakers was used to control nav lights etc.. The original fuse holder now feeds the interior lights and cig sockets etc.. The lower switches are the 2 speed wiper switch and the auto/manual bilge pump switch. |
 |
|
The original 10 watt
Nav lights were replaced with Hella 25 watt (20metre) lights,
and the mast was modified to take an anchor light. (Also needing the plug/socket
changing from 2 pole to 3 pole). |
 |
|
I fitted a Navman 440 fishfinder to get speed/depth functions without having to drill any holes below the waterline (it has a single transom transducer). The compass was inset into the top (after checking for deviation). Also visible is the new cabin hatchway. I cut it from thicker ply and hinged it at the forward edge. Although the original could be completely removed whilst under way, the much greater rigidity and security outweighs the inconveniences. I found that the loose version could be wrenched open with your bare hands. |
 |
|
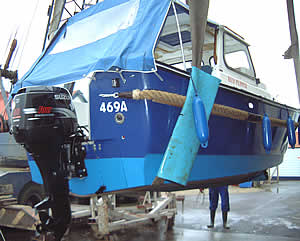
Although the boat was built in 1989, it has the hull of the post 1998 Pilots. The keel has a maximum depth of 2", and the transom below the outboard well is inset to give the correct angle, as in the latest Bosuns. I can only guess that this was an early experiment by Hardy's. It shouldn't suffer from the drag and cavitation caused by the larger keels, although there may be less directional stability at displacement speeds (although no worse than in a Bosun). |
 |
|
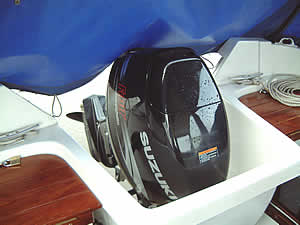
As the Suzuki DF50 is a three cylinder 4 stroke engine, it fits comfortably in the Bosun outboard well, clearing the water when fully tilted. I chose it in preference to the Honda because it was cheaper and has acquired a good reputation for reliablity and economy since it's introduction 3 years ago. My last few cars have all been fitted with EFI, and they have been very smooth, reliable and economical. I only hope the marine versions will be the same. It starts instantly, is very quiet, and uses 1/3 gallon per hour at river speeds. Suzuki have a website at http://www.suzukimarine.co.uk/ |
 |
 |
|
|
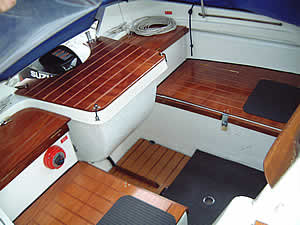
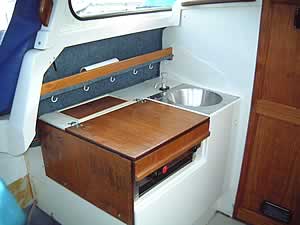
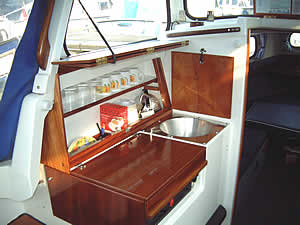
The pre - SE Hardy Pilots have the advantage of the third (quarter) berth in the cabin provided by the galley moulding in the wheelhouse. The cooker is slightly larger and has a grill. The downside though, is the lack of a passenger seat, which the SE does provide.
I therefore resolved to provide some sort of passenger seating, and at the same time, improve the galley facilities. The result is shown here. I replaced the cooker lid and side panel with new mahogany marine ply and boxed in the rear section after removing the carpet (and painting the inside surface of the fibreglass with white Danboline). It needed some fairly accurate three-dimensional carpentry as the top rail is tapered. The original cooker flap was charred on the inside, so I've added a metal heat shield to prevent re-occurence. I removed the cooker to clean it, and, in anticipation of the BSS, I renewed the gas pipe, bringing it directly into the back of the cooker (eliminating the hose that previously existed), and installed a labelled shut off valve at the left rear side. The 'door' to the cupboard (which also doubles as the seat backrest), was made in two longitudinal halves and hinged in the middle, to provide a shelf/worktop whilst the galley is in use. When travelling, the door is folded down and a seat squab, (made from matching blue vinyl material over a 3" foam block, stapled to a piece of 5mm ply), is held in place with a velcro pad. A mahogany footrest was fixed about 8" up from the floor, and covered with the same ribbed rubber matting as used on the floor. (the fibreglass moulding is not very thick, so a substantial wooden backpad was made to take the 8mm stainless through-bolts.) This provides a comfortable
seat with ample room for two adults. |
   |
|
Not a very clear photo I'm afraid, but here's where the VHF lives. I turned a mahogany plinth about 100mm diameter to take the radio's u-bracket, and angled the base to give a horizontal turntable, despite the sloping cabin top. The whole thing still unplugs easily for security. I kept all of the power and aerial cabling on this side of the wheelhouse, to avoid interference with the fishfinder. Also visible is the rear-view mirror. (It has to be mounted quite low down to compensate for the bows-up angle when planing.) |
 |
|
The carpet covered footrest was used as a pattern to cut a new one out of mahogany ply, and I replaced the floor carpet with a 2 metre x 1200mm piece of industrial rubber matting. I chose the 5mm thickness (in preference to the 3mm), so that it would lay flat without needing to be stuck down. It seemed a bit expensive at just over £60, but was still cheaper than Trakmark, even without considering the cost of the epoxy adhesive. It's very non-slip and can always be lifted out on the dockside for the occasional scrub. There were sufficient offcuts to create matching mats for the footrest and side lockers. A cheap hessian doormat was a simple solution to the muddy trek from the car. ( £1.99 from Homebase, rather than the £12 'welcome aboard' sort from Chandlers !) Also visible is the plastic vent to the cabin door (there's another at the top), which combined with the two tannoy roof vents, keep the cabin reasonably condensation free during the winter months. |
 |
|
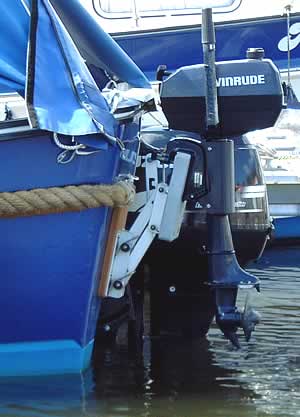
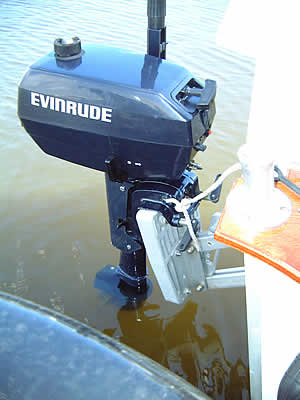
When I fitted the auxiliary bracket, I mounted it as low as possible, (overlapping the drain hole from the gas locker by about 1", but leaving it clear by cutting a notch in the teak backing pad.) I found that hull was only about 6mm thick in this area, so I epoxied 4 layers of 4mm ply to the inside to spread the load. I have now found that I can use a standard shaft outboard, which is clear of the water when on the highest setting, and is at the correct depth when at the lowest position. I felt it to be a distinct advantage to use a short shaft, so that it could also be used to power the inflatable dinghy (when I get round to buying one.....) The Evinrude, though no longer produced, is ideal for this, as it weighs only16kg and yet is a beautifully smooth twin cylinder model which runs very quietly. ( a long shaft would increase the draft when used on a dinghy, and produce unnecessarily extra drag.) |
  |
|
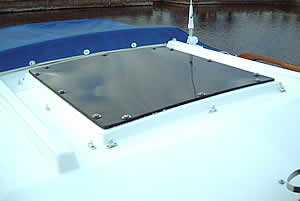
I much preferred the Bosun's transparent hatch to the Pilot's removable plastic cover, but couldn't justify the expense. I didn't really need the top to open as the wheelhouse is open-backed anyway, so I fitted a sheet of smoked polycarbonate. I carefully cut it to size and routered a chamfer around the edge, then bolted it on to a bead of silicone. The 8mm thick sheet is (allegedly !) unbreakable, and only cost £40. I left the turn-studs as the flexible cover still fits over the top, so I will put it on during the winter layup. |
 |
(all of the
images on this page were taken with a Fuji Finepix 4700 digital camera)
(they have been significantly downsized and optimised for fast loading over
the web)
Shorebase/Boats visitors since June 1997
©2004 Shorebase